


Media Tags are a great way to find related content. There are a few ways to create a Media Tag and different tag-levels for different accounts and groups.
Create a Tag
To create a tag, go to Administrative Tools > Media Tags. Click on the Create Media Tag button.

Type in the name for the tag, and if you have the option, choose between Personal, District, or School Tag. By default, all tags are set as active. Click the Create button.
Personal Tags: Personal Tags can be created by any access level and can only be selected by the user that created them. Teacher access levels and lower are not given any options for tag types, so all tags created by these access levels are automatically personal tags.
School Tags: School Tags can be created by a user with a School Administrator access level or higher.
District Tags: District Tags can be created by a user with a District Administrator access level.
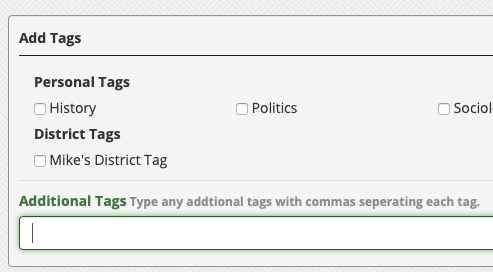
Add Personal Tags While Editing Media
Tags can also be created while editing your media files.
To do this, click the the edit icon (pencil) on the media item to which you want to add a tag. Scroll down to the Add Tags section. As you enter tags/keywords for a specific media file into the Additional Tags field, the system will automatically create a personal tag for each keyword, and will display those tags when doing any future edits on any of your media files.
Editing Tags
To edit a tag, go to Administrative Tools > Media Tags. From here, you can either:
- Delete the tag by clicking the trash icon
- Change the name or type of tag by clicking the edit icon (pencil)