


The Teams feature allows a subset of users to fully collaborate on media. Each team member can interact with a piece of media as if it is their own content. This means that each team member can: share any video, image, audio or other file that is part of said team; edit a team video or image using the MyVideoSpot editor tools; add new thumbnail images or change any metadata attributes of the media item. While users of any access level can be added to a team, you must be a part of the Teacher user class or above to create a team.
Creating a Team
To create a new team, click the Administrator Tools icon (toolbox) on the top menu. Select Teams under the Media Administration section and click the Create Team button. Give your team a name and an optional description and then click the Create and Add Users button. This will bring you to a page of users within your district that you can add to your team. Please read the caution message carefully: “Any member of a Team, regardless of access level, can view, edit, and delete any media added to the Team.” Think carefully about who you add to your teams. Click the plus sign next to a name to add a single user or check the checkboxes next to several users and click the Add Selected Users to Team button. You will get a confirmation message at the top of the page to indicate the new members were successfully added.
Editing Options
If you’d like to make changes to your team later, click the Teams icon (people carrying together) on the top menu. Click the Update icon (pencil) at the end of the row your team is listed in. Here is where you can change the name and description of the group.
How to Add or Remove Users from a Team
To add users to a team, click the Teams icon (people carrying together) on the top menu. Select the Add Team Members icon (person) at the end of the row your team is listed in. Click the plus sign to add a single user, or check the check boxes next to several users and click the Add Selected Users to Team button. You will get a confirmation message at the top of the page to indicate the new members were successfully added.
To remove users from a team, click the Teams icon (people carrying together) on the top menu. Click the View/Manage Team icon (eyeball) at the end of the row which will bring up a list of the users in the team. Click the minus sign at the end of the row to remove a single user, or check the checkboxes next to several users and click the Remove Selected Users from Team button. You will get a confirmation message at the top of the page to indicate the member list was successfully updated.
How to Add and Remove Media to and from a Team
There are three methods to add media to a group, giving you the option to choose the method that is best for you.
Add Content that is Already in Your Account
The first method is to use the Add to Team dropdown under a media item.
1. Select a media item in your gallery.
2. Locate the Add to Team dropdown button below the media preview.
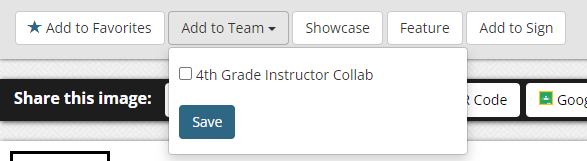
3. Check the box next to the team(s) you want to add it to and click the Save button.
Add Multiple Items from a Folder or Your Homepage
This method is best if you’d like to bulk add media items to your team(s).
1. Switch your media gallery from the gallery view to the list view by clicking on the List View button.
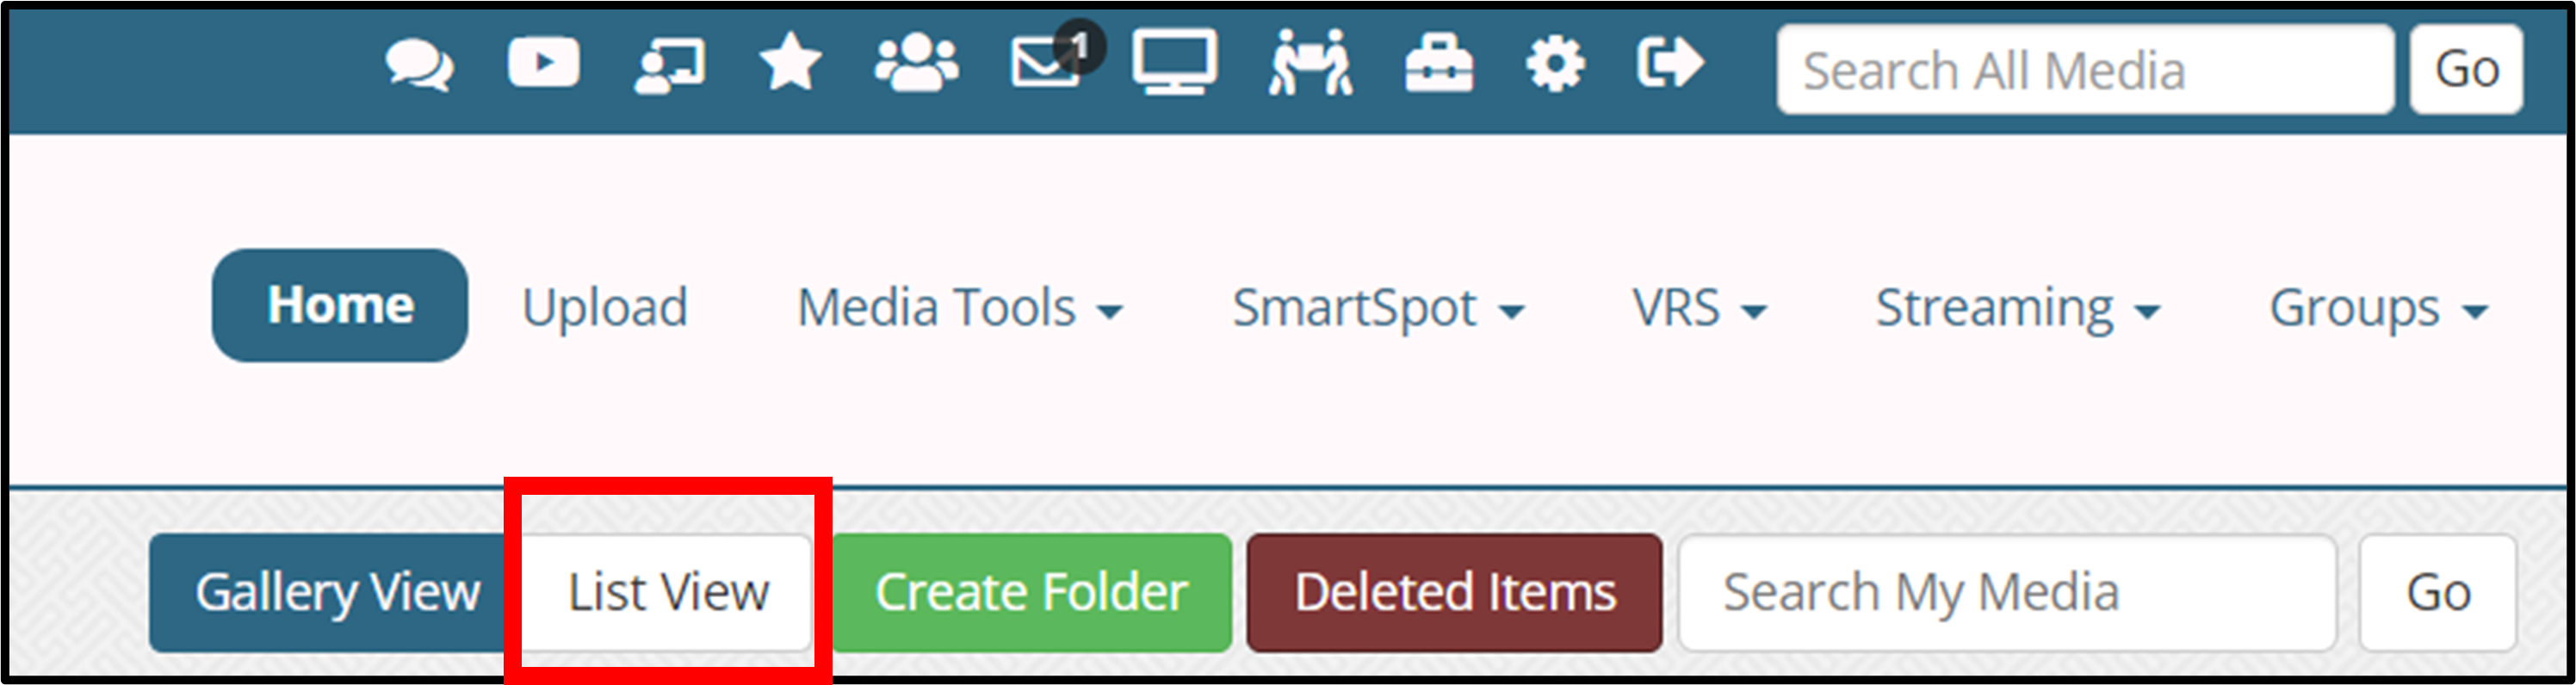
2. Check the item(s) you’d like and click the Add Selected Items to a Team button.
3. Select the Team and click Add to Team.
Directly Upload Content to a Team
1. Click the Teams icon on the top menu and click the Team Media icon at the end of the row.
2. Click the Upload to Team button and you’ll be navigated to an upload page that functions exactly the same as our normal upload tool.

3. The content uploaded directly into a team will also be added to your personal media gallery.
Removing Media
To remove media from a team, click the Teams icon (people carrying together) on the top menu and click the Team Media icon (film strip) to the right of the team. Click the X icon below the thumbnail to remove an item. If you need to remove multiple items, click the List View button at the top of the gallery and then check the checkboxes for as many media items as you’d like. Click the Remove Selected Items from Team button.