


It’s quite easy to edit an existing MediaSpot project that you have previously saved. Locate your project in your media gallery and click on the Edit Project icon (magic wand) for the project you want to edit. This will display your project just the way it was left when you last saved it.
Editing Your Video: If you want to change the video that is already placed in your project, or if you didn’t have a video in your project when you originally saved it, click the green Video icon. Either select, record, or upload a new video. Your new video will now display in your project.
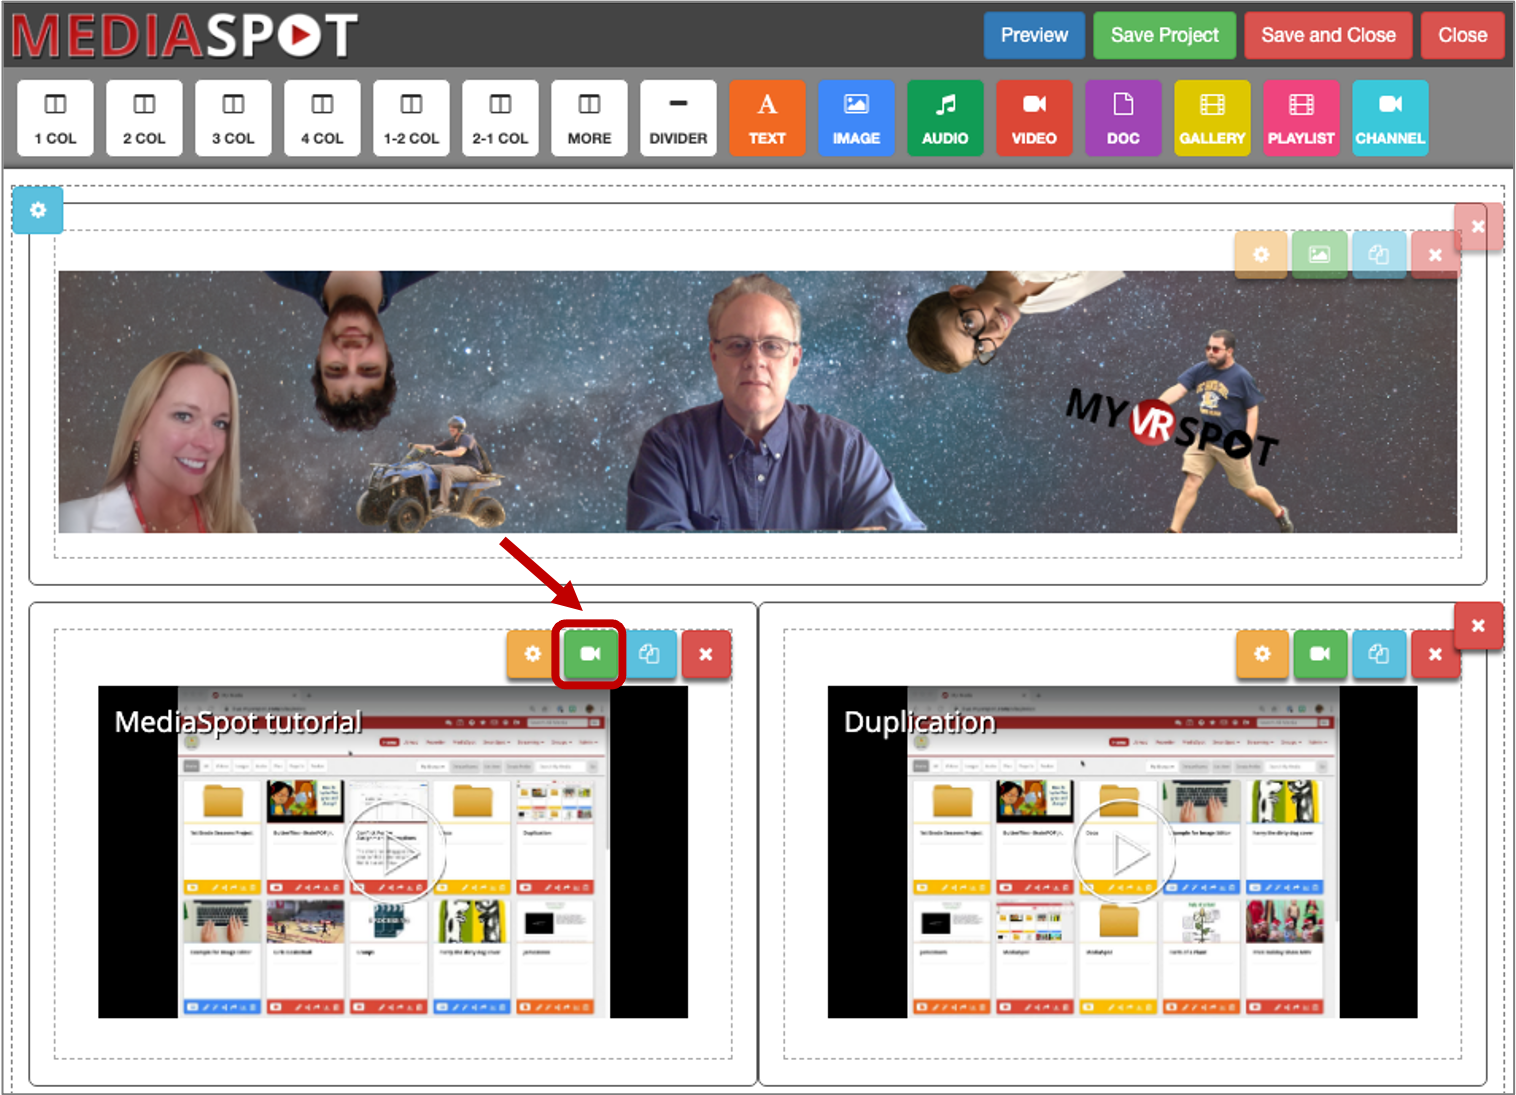
Editing Your Images: To change any of the existing images inserted into your project, or to add images to existing image placeholders, just click the green Image icon on the top right above the existing image or placeholder. You can select from images in your account, images from your favorites list, or all images that exist in your school/district that you have the permission level to access. You can also upload an image from your device from inside the image selector. Your new image will now display in your project.
Edit Existing Text Fields: To change any of the text fields inserted into your project, or to add text to available fields within your project, just click the green Text icon on the top right above the existing text or text field placeholder. This will display the text editor and any existing text already inserted into this field. Once your text has been edited, click the Apply button. Your new text will now display in your project.
When making any edits to an existing project, make sure to click the Save Project button in the top right to save your progress.