


Although OBS is capable of high resolution encoding and is packed with all sorts of features, we need to take into account the resources required to stream smoothly and reliably.
Video Resolution and Frame-rate
Video resolution and frame-rate can have a significant impact on the quality of your live stream and the recording of the stream. For example, streaming at 1080p vs 720p will double the number of pixels, increasing the demand on your PC or mobile device. Increasing the frame-rate beyond 30fps will also have an impact on performance.
Video Resolution
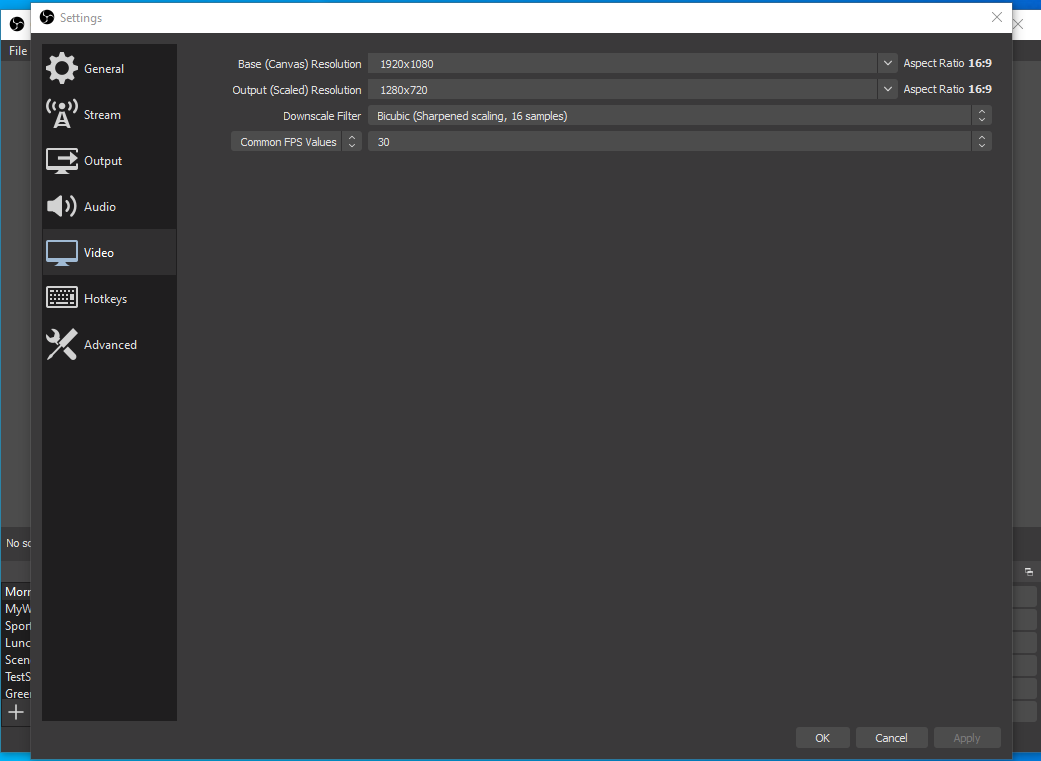
Open OBS and click File > Settings > Video. You’ll see a Base resolution and an Output resolution at the top of this page. Base resolution, also known as the Canvas, is the resolution at which you want to display or record your video. A common resolution is 1920×1080 or 1080p. Although you can use this as your base resolution for recording a video, we would recommend changing the Output resolution to something lower such as 1280×720 or 720p for streaming. Broadcasting at 1080p vs 720p will double the number of pixels, increasing the demand on your PC or mobile device. Lowering your resolution to 720p will greatly reduce the stress on your hardware and reduce the likelihood that your viewers will experience buffering or stuttering.
Frame-rate
To adjust your frame-rate, open OBS and click File > Settings > Video. The fourth option on this page is your frame-rate, or FPS setting. Your typical TV show or movie plays at 24 frames per second, which will work for most scenarios. Something like a sporting event would require a little more, usually 30fps. As with most settings, we recommend starting lower at 24fps and adjusting once you’ve tested. You can certainly increase this value if your environment allows, but consider that 60fps and higher are typically used for video that will be played back in slow motion and may not provide any benefit for what you are recording.
Encoding and Quality Settings
There are many quality and encoding settings that can be tweaked in OBS. If you are experiencing stopping and stuttering during a stream, or while playing a recording of that stream and you have already adjusted the settings discussed above, you may need to adjust your encoding settings.
To change the encoding settings, follow the steps below. We will show you some basic settings to try, but you can try your own settings as well. If you do decide to choose your own settings, we would highly recommend allowing yourself sufficient time to test before you need to go live.
Simple Output Mode
Open OBS and click File > Settings > Output. At the top of this page you should see “Output Mode: Simple.” In this mode we will look at two primary settings, Video Bitrate and Audio Bitrate.
The video and audio bitrate will be set to a lower value by default. You can increase these values, but keep in mind that your total bitrate demand will include both video and audio. For example, if you have 2Mbs or 2000Kbs upload bandwidth available through your network connection, you need to make sure the sum of both video and audio bitrates equal about half of that or around 1000Kbs. This will minimize the chances for buffering during the stream and/or lost frames in a recording. See our recommended settings below:
Advanced Output Mode
Open OBS and click File > Settings > Output. At the top of the page, click the dropdown menu next to Output Mode and select Advanced. See the screenshot below for our recommended settings. This is a good place to start and works for many situations, but ultimately these settings will depend on your hardware and environment.
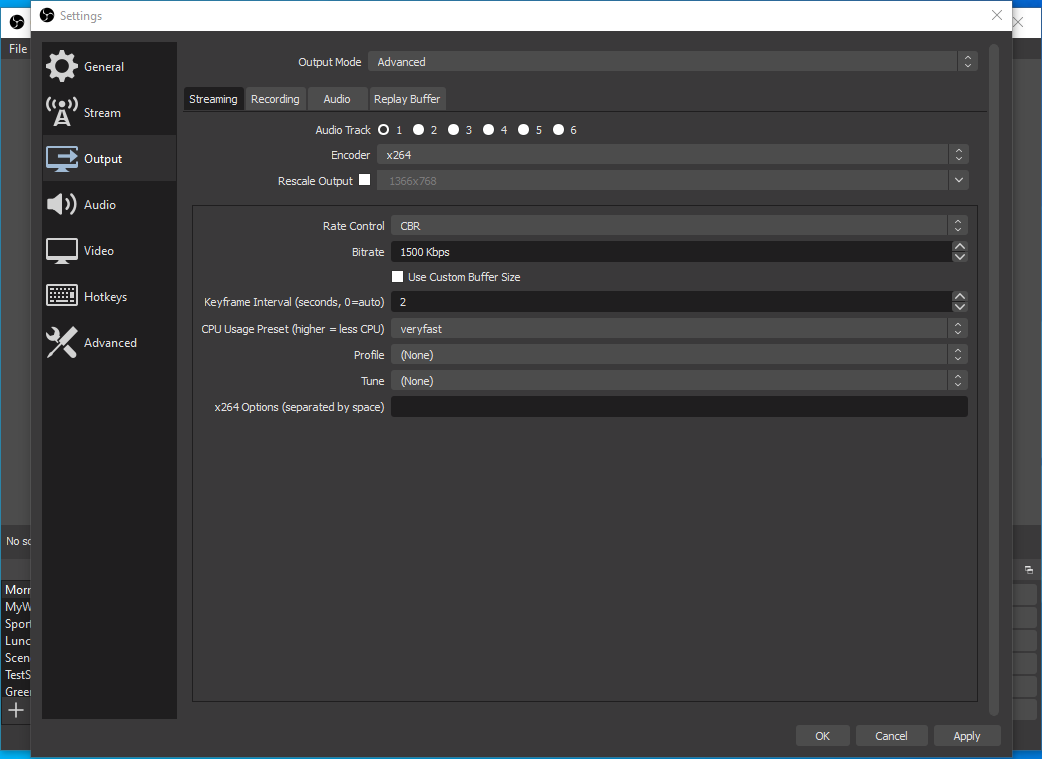
Encoder: x264
Enable Advanced Encoder Settings
Custom Encoder Settings: veryfast
Video bitrate 1500
Keyframe interval: 2