


The MyVideoSpot Assignments integration with Schoology allows you to embed SmartSpot quizzes and use grade passback with the results within Schoology.
Installing the App
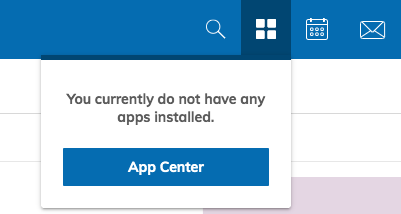
- Click on the App Center icon (four squares on the top menu bar).

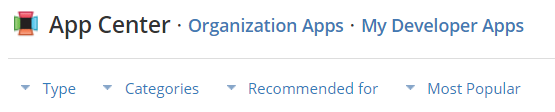
- On the App Center page, click on the Type dropdown and select LTI App.

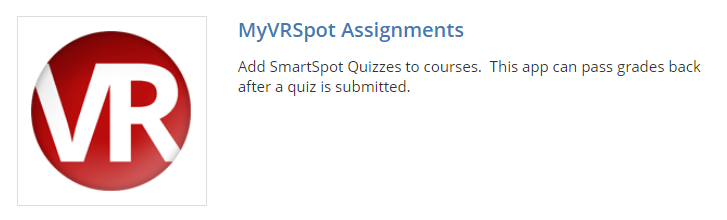
- Click on MyVRSpot Assignments from the list of apps.

- Click on the Install LTI 1.1 App button.

- For the first pop-up, click I Agree to agree with sharing information between MyVRSpot and Schoology. For the second pop-up, select Install for Me if you’re installing the app just for yourself. If so, you’re all set– you’ve added MyVRSpot Assignments to your Schoology account! If you are a Schoology admin that’s adding this to your district though, please select Add to Organization and continue to follow these steps.
- You should now be on your Organization Apps page and MyVRSpot Assignments is listed. Click on the Install/Remove button.

- Click the All Users checkbox to select all Schoology users within your district. If you’d like to limit it to just certain groups, this is where you’d modify that as well.

- Once you hit Submit, click on the Configure button and input the Consumer Key and Shared Secret. You can find those by going to the Admin dropdown on MyVRSpot and selecting Apps and then clicking on the Installation button under the MyVRSpot Assignments for LMS Platforms header.
- Once that is submitted, you’re all set!


Using the App
Adding a SmartSpot Quiz as a Material
- Click on the Add Materials dropdown button and select Add File/Link/External Tool.
- Select External Tool.
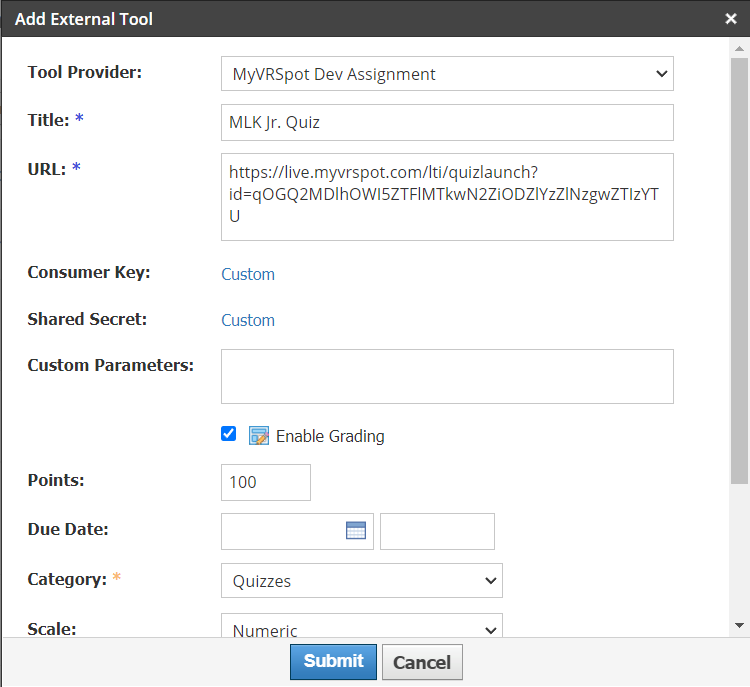
- Change the Tool Provider dropdown to MyVRSpot Assignment and give your quiz a title.
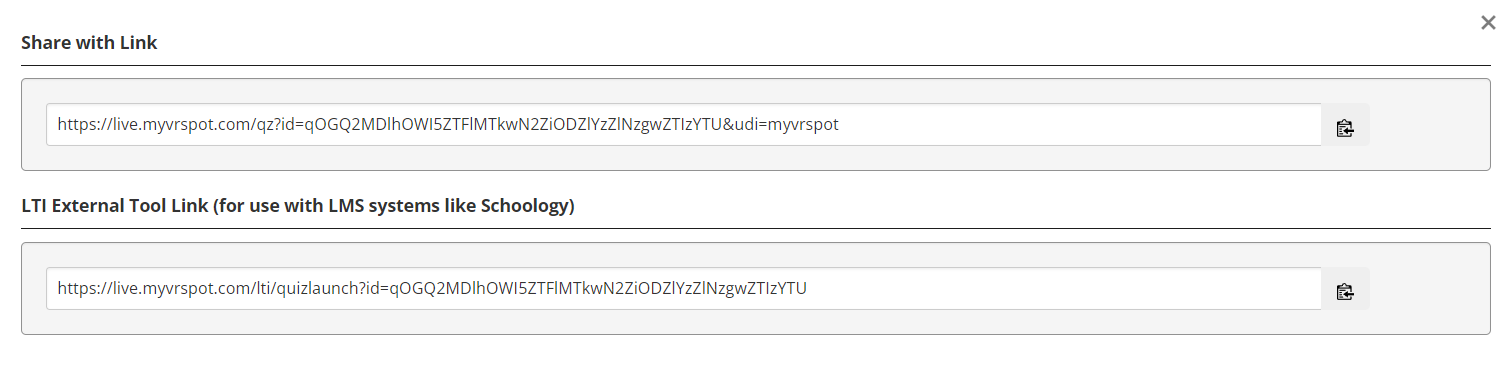
- In a new tab, navigate to your SmartSpot quizzes. Click the Link icon (chain) to the right of the quiz you’d like to use and copy the LTI External Tool Link.

- Return to your Schoology tab and paste the link into the URL field. Leave the Consumer Key and Shared Secret blank.
- Check the Enable Grading checkbox and choose your options within.

- Click Submit when you’re finished.
Grading a Quiz
If your quiz doesn’t contain any open answer questions, it will be automatically graded as soon as your student submits their quiz. This means that the grade will show up within your gradebook in Schoology without you having to lift a finger. However, if your quiz does contain open answer questions, read on to see how those are handled.
Grading a Quiz with Open Answers
Once a quiz has been submitted, you can grade it within MyVideoSpot like normal, or you can grade it within Schoology.
- Navigate to your quiz on your list of materials within your course.
- Click on the Grade Quiz/View Results button in the upper left.

- Click on the Grade button to the right of the submission you’d like to grade. (If you need to delete a quiz submission instead, click on the Delete Result button. If a student navigated away from their quiz before submitting, click on the Force Grade button to grab whatever answers they completed.)

- Once finished, click Submit. It will automatically be added to your Schoology gradebook.
