


With SmartSpot, you can create quizzes in four different question formats and insert those questions within your videos. Follow the steps below to learn how.
Create a New Quiz
Step 1: From the top menu, click the SmartSpot dropdown and select Create Quiz.
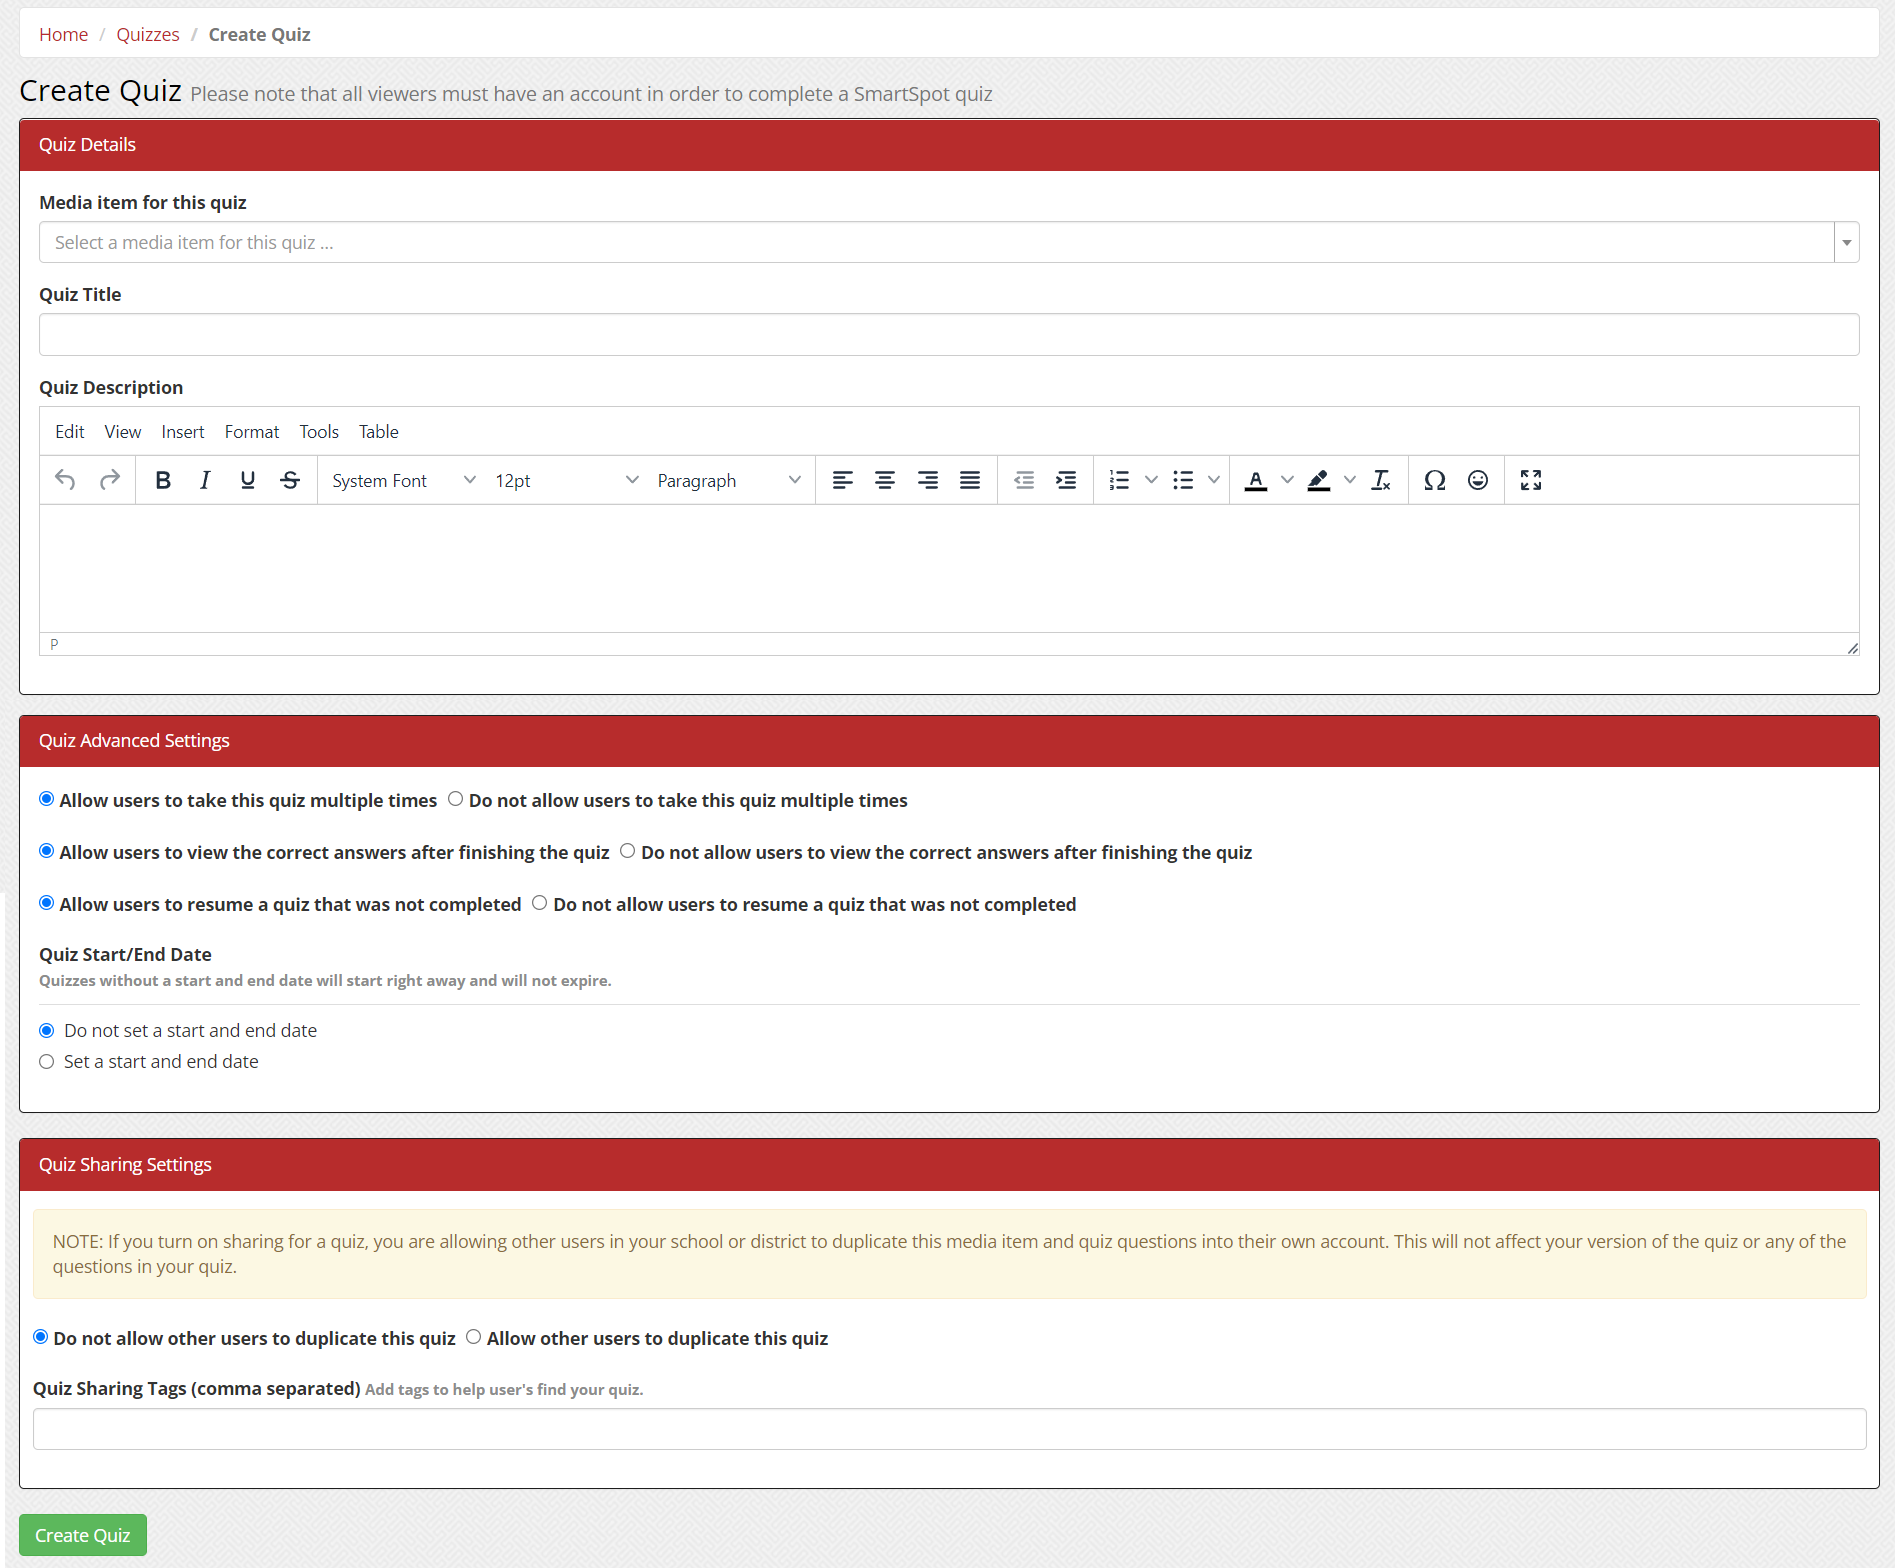
Step 2: Select the video that the quiz questions will be attached to by typing the title of the video into the Media Item for this quiz field.
Step 3: Give your quiz a title and an optional description.
Step 4: Select your quiz preferences and options:
- Take this quiz multiple times
- View the correct answers after finishing the quiz
- Resume the quiz that was not completed
- Set a start/end date
- Allow users to duplicate the quiz
- Add quiz sharing tags
Step 5: Click the Create Quiz button when finished.
How to Add Questions to a Quiz
Continuing from the steps above, you’ll now see a screen with a video on the left, which is your media preview, and the questions that you’ll be creating on the right.
Question Types
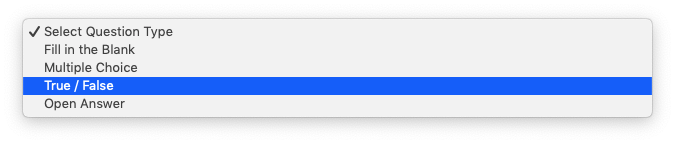
The first step to creating questions is to select the question type. Note that the first three question types are auto-graded, but the open answer must be manually graded.
- Fill in the Blank: If you use this question type, add your question and add all of the correct answers (such as 95% and 95 percent) to the question. If your question has more than one correct answer, click the Add Answer button.
- Multiple Choice: Add your question and then add your choices. Make sure you select the correct answer in the dropdown.
- True or False: Add your question and then select the dropdown to designate if the correct answer is true or false.
- Open Answer: Open answer allows for a full typed response by the user, but these responses cannot be graded automatically.
- Add An Existing Question: Another option for adding questions is to add an existing question. These questions are questions that you’ve already created or used in the past and they already have the correct answers selected.
Question Timing
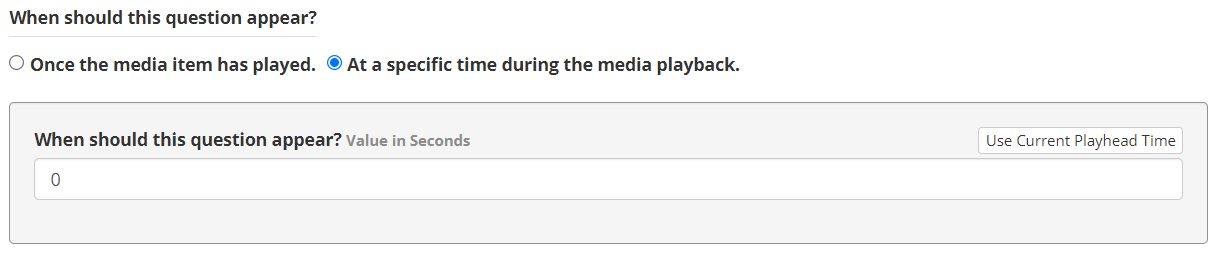
You will decide when the question should appear after creating each question. You can either have the question appear after the media item has played or at a specific time during the media playback.
If you choose the latter, you can type in the seconds. Alternatively, you can click the Use Current Playhead Time button which will have the question appear at the time you are viewing the video in the media preview. Once you click it, the seconds field auto-fills with the playback time of the video.
Assigning Point Values
By default, each question has a point value of 1. However, you can change the value yourself while creating the quiz question.

Once you’ve finished a quiz question, click the Save Question and Add to Quiz button.
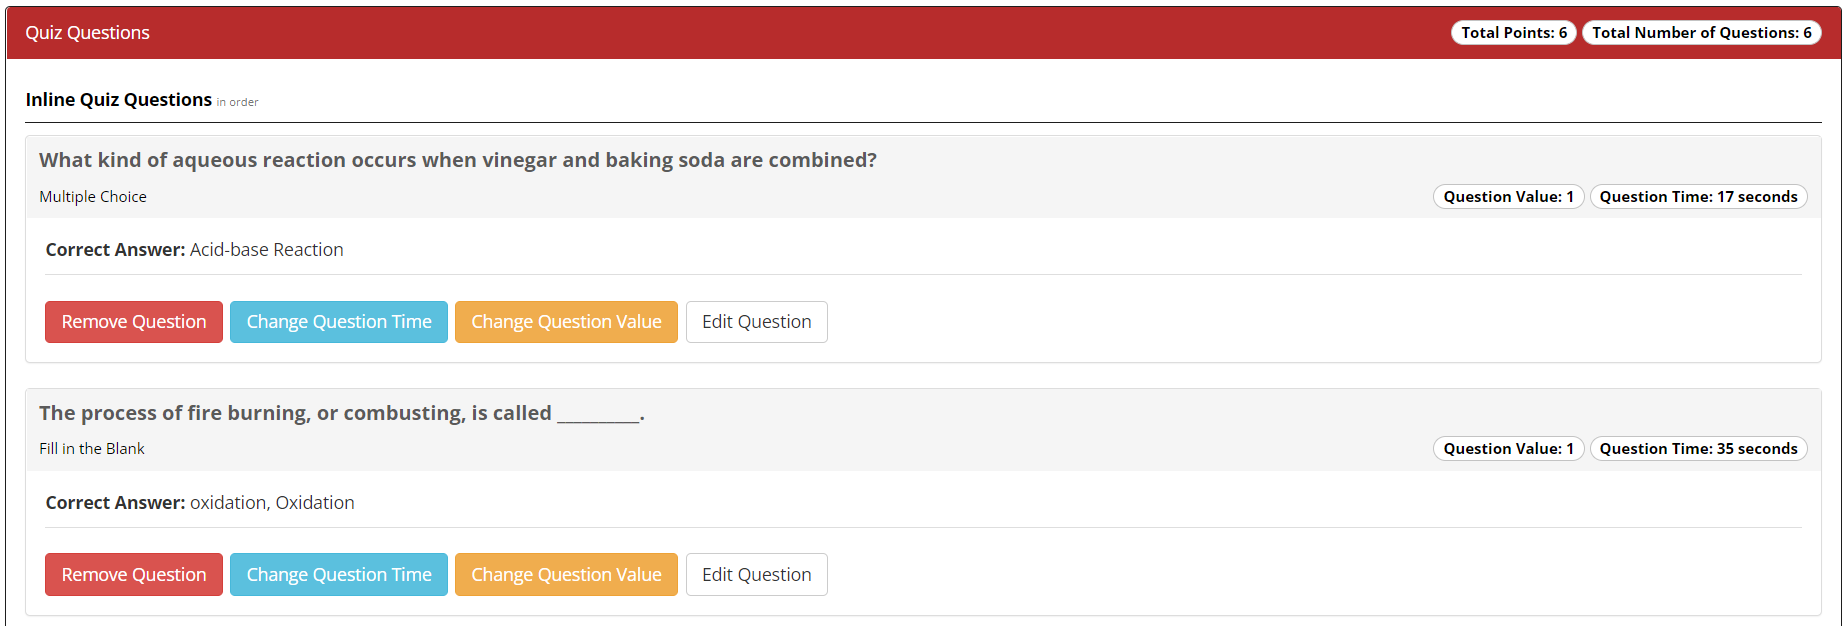
Editing Your Quiz Questions
You can review and adjust your quiz via the Quiz Questions section underneath the area where you created your quiz questions. From this section, you can do the following:
- View the total number of quiz questions and points
- Edit or remove questions
- Change the time a question appears
- Change the point value of a question
- Change the order of the questions that are set to appear at the end of the quiz
Share Your Quiz
After you click the Publish Quiz button, now you can share the quiz with your students or audience. If you need to find this share screen later, click the SmartSpot dropdown from the top menu and select My Quizzes. Then click the Notify Users (bullhorn) icon to the right of the quiz you want to share. Here are a few options for sharing your quiz:
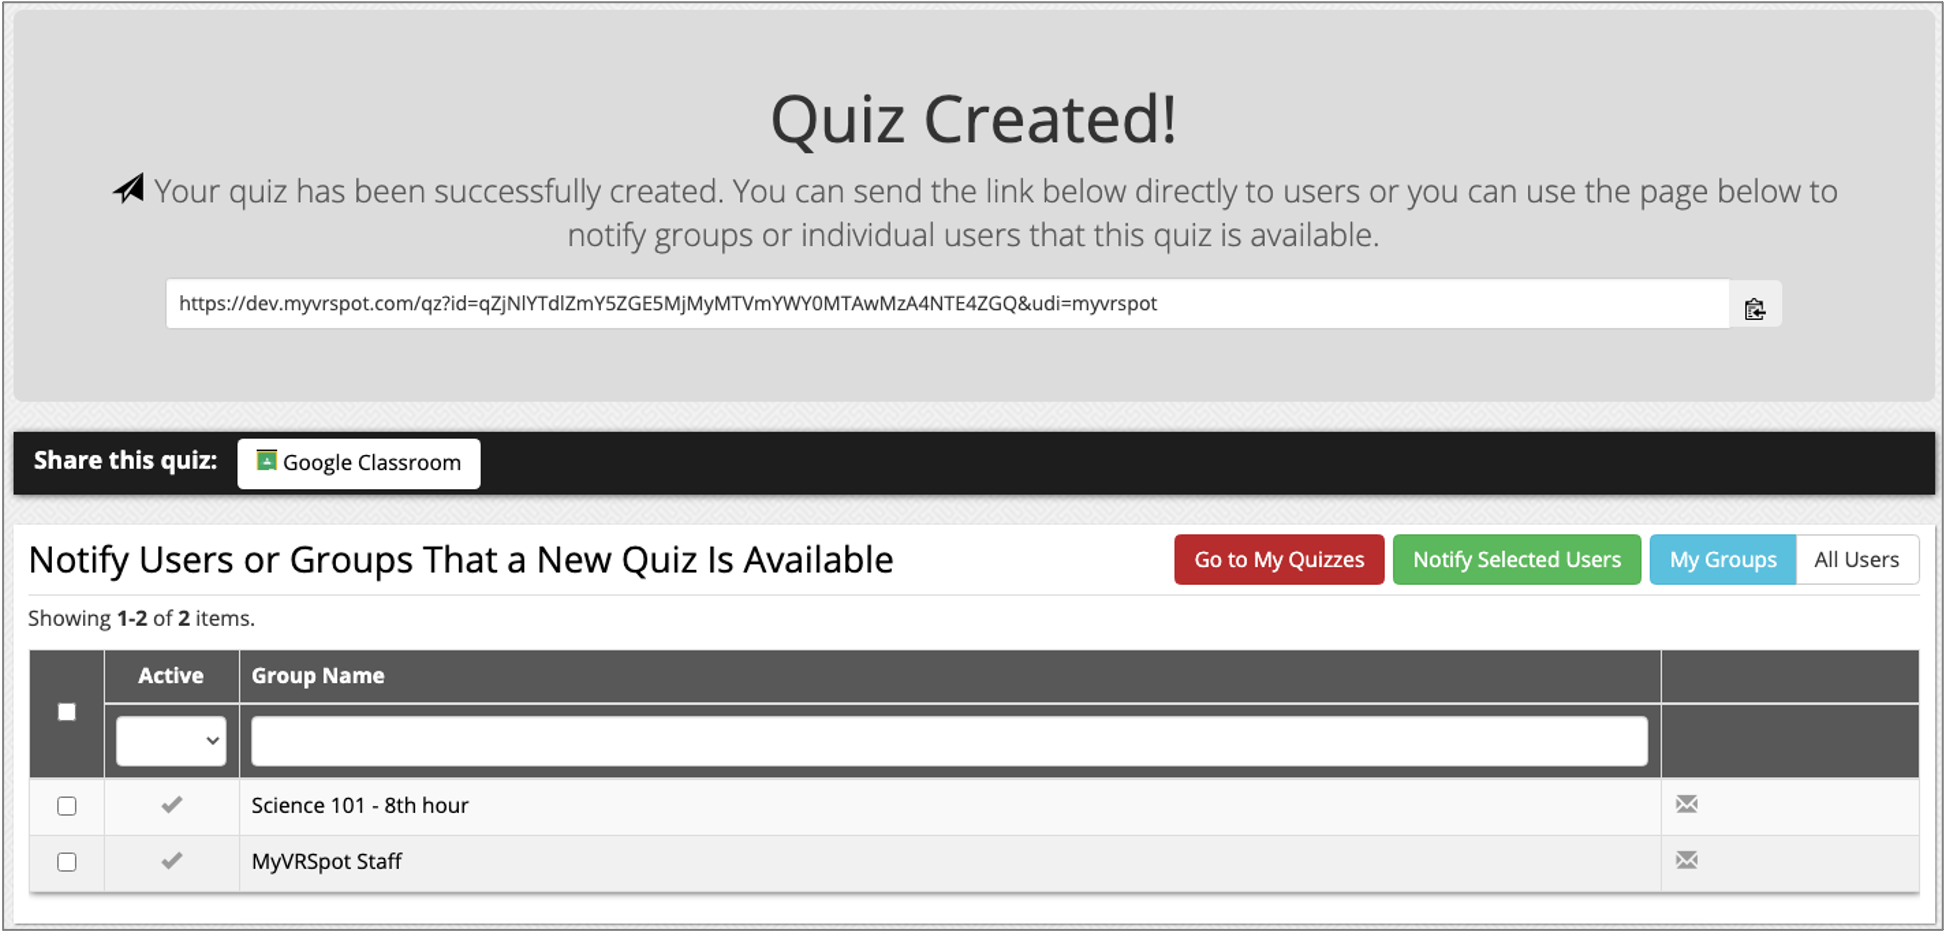
Share the URL: Copy and paste the URL and share it in an email, website, or LMS platform.
Notify individual users: There are three methods of notifying individual users. First, you can email your group the unique URL for the quiz, which is located under the “Quiz Created!” section. Or, click the All Users button which will list all users. Check the checkboxes to the left of the users’ names and then click the Notify Selected Users button. Or, click the mail icon to the right of the users’ names and they will be notified individually.
Google Classroom: Under the “Quiz Created!” notification, there is a Google Classroom button. Click this button, login to your Google account, allow access, and select the class in the dropdown.
Notify groups: To notify multiple groups, check checkboxes left of the group names, and then click the Notified Selected Users button. Alternatively, click the mail icons to the right of the group names.