

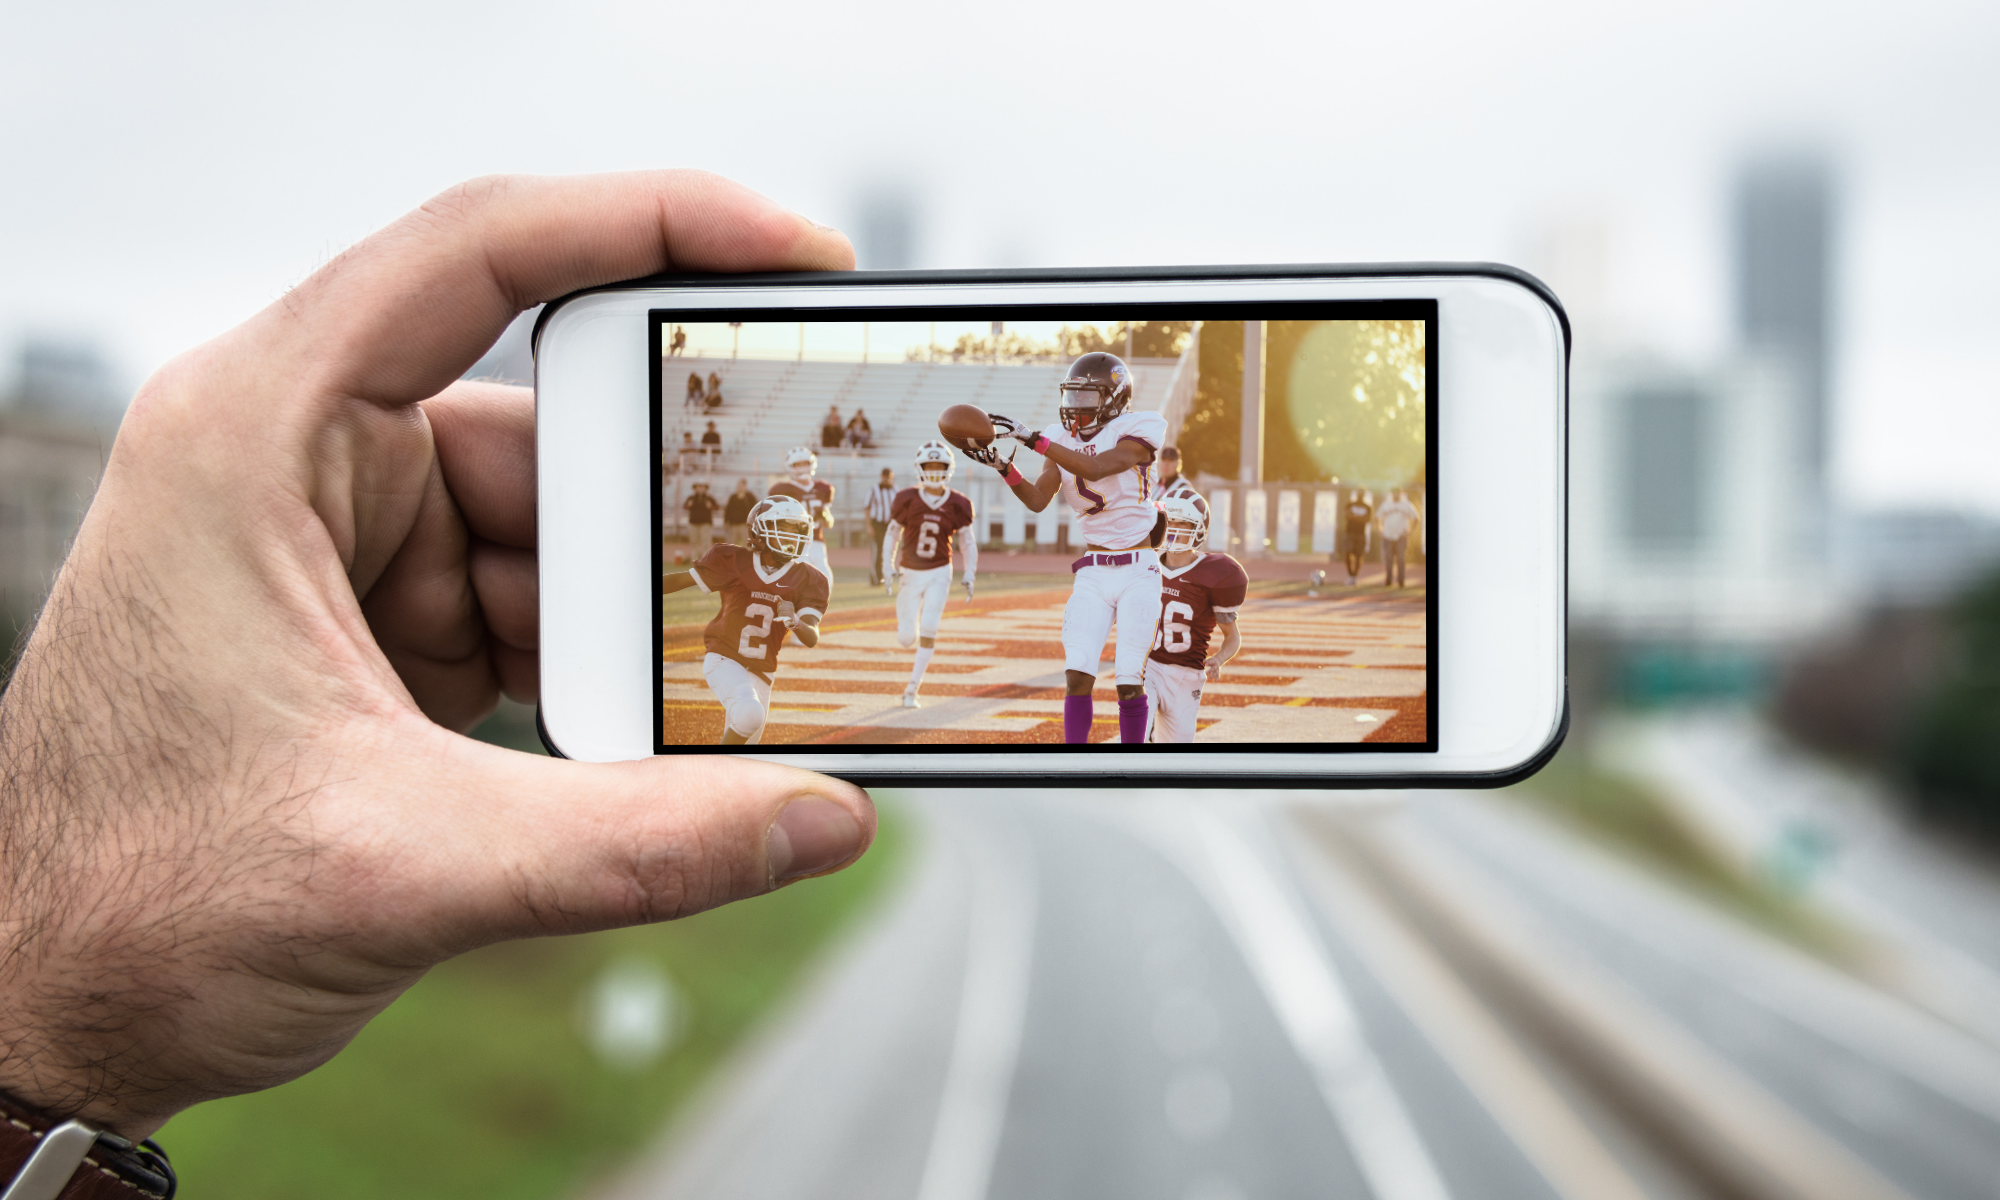
The NewTek Tricaster has a lot of features, and can sometimes be a bit overwhelming at the start. This article will focus on getting the device ready to stream with a MyVRSpot streaming channel.
The first step, is to log into your account to obtain the streaming RTMP address for the channel you want to use for streaming. Log in to your account, click on the Streaming menu item, and click Manage Channels.
This page should display all the channels you can use for live broadcasting. Click on the name of any channel, or click the eyeball under the Actions column to view all of a channels details.

This page contains a lot of useful information. The most important items are outlined below, but to setup the Tricaster we will need the RTMP and the Channel fields.
Name: This is a text value to describe the channel. It is displayed on the streaming player page that we provide above the video player.
Description: This is a text value to give viewers more information about a stream. It is displayed below the streaming player page that we provide and resides below the video player.
Active: Streams can be toggled ON and OFF of active status. A channel must be active in order for anyone to stream to the channel.
Stream Permission: This permission setting only applies to users viewing the stream through MyVRSpot. This permission settings effects which channels users see when going to Streaming -> All Channels from the MyVRSpot menu.
RTMP: This is the address you will need to stream to this channel. We recommend using the API Key that you can generate on the channel information page, but if you want to enter your password into the RTMP address you can. Please note that if you want to enter your password, the RTMP will contain the text YOURPASSWORDHERE. That text must be replaced with your password when entering this information into the Tricaster.
Channel: This is the unique identifier for your stream. We will need this value for the Tricaster setup.
Stream URL: This is a public streaming viewer page that we provide. You can distribute this stream to anyone that will be viewing the stream.
Embed: The embed code is a piece of HTML code that you can insert into a website to display the live stream.
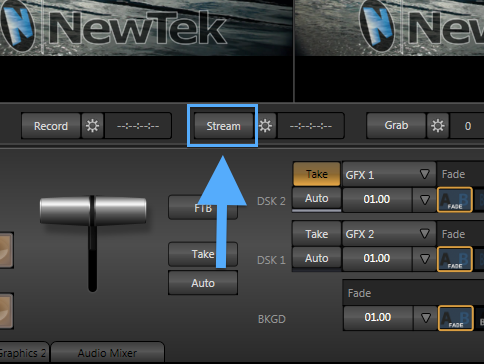
When you launch the Tricaster software, you will see your video output preview window in the upper right hand corner.

This is what will be broadcasting live once you start the stream. Under this box, there is a button that says Stream, with a gear icon next to it. Click on the Gear Icon next to the Stream button.
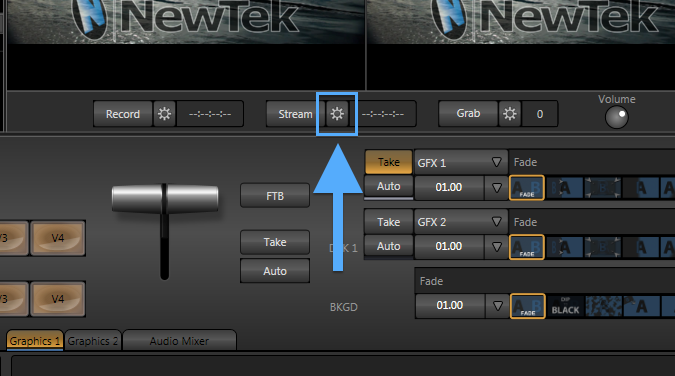
This will bring up the streaming settings page that will allow us to change the settings used to stream live.
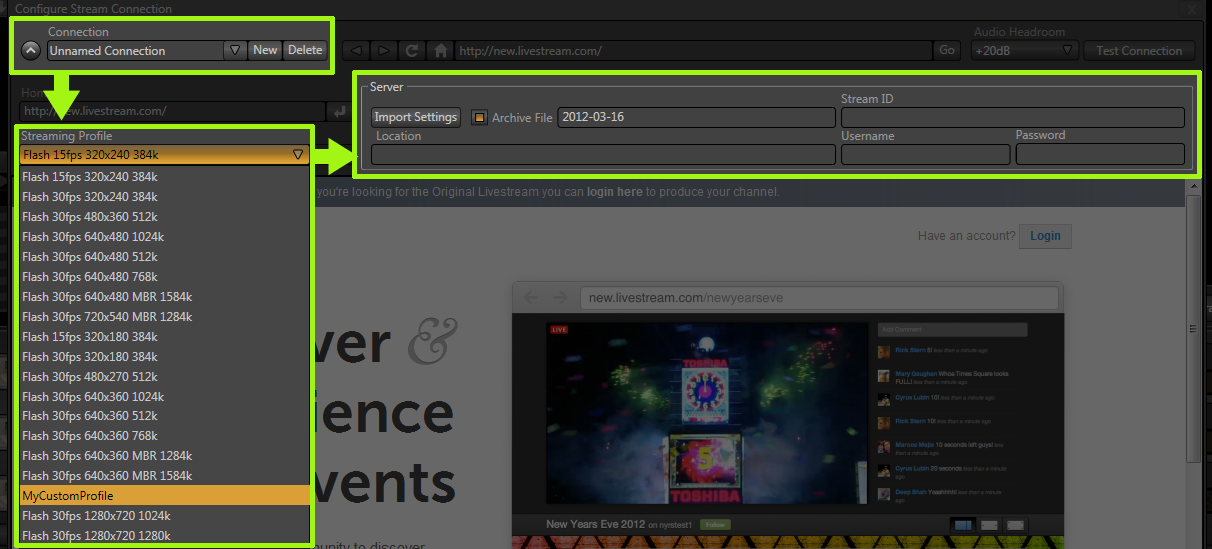
There are three sections that we need to change on the Connection Settings page, but first we want to make sure that the Tricaster has an active internet connection. The Connection Settings page has a full web browser built in that we will use to verify the internet connection. There is a URL address bar right next to the home button. Manually type in a URL such as http://www.yahoo.com and click go. This should show the Yahoo home page in the browser window. If you cannot navigate to any websites, contact your system administrator to get the computer connected to the internet. Once you have verified that you can navigate to a website, you can continue to the next step.
Since this page has a fully functioning web-browser, it may be helpful to go to your MyVRSpot account from within this browser so that you can easily copy and paste your RTMP information. Therefore, in the address bar replace http://www.yahoo.com with your MyVRPSpot login page. Log in to your account, click on the Streaming menu item, and click Manage Channels. Click on the channel you would like use to get the details we will need for the next steps.
Step 1: Under the Connection box, click New. You can rename this connection if you would like, which can be useful if you will be broadcasting to multiple channels in the future.
Step 2: Choose a streaming profile. These are the quality settings for your stream. It may take a few test streams before you finalize the settings you would like to use. To broadcast in HD for example, you would need to have an upload bandwidth of at least 3MB per second on average. You can check your upload speed using http://speedtest.net. When you are running the test, you will want to look at the Upload Speed (this is typically smaller than the download speed). Based on your connection speed, you will set your streaming profile.

There are 3 main pieces of the profile. For smooth video you will want at least 30fps (frames per second). The next portion is the resolution. We recommend at a minimum a resolution with 640 width and 1280 is even better if your bandwidth will allow. The last portion is the bit rate. The higher the number, the smoother your stream will display. Again, you must have a high upload connection for higher bitrates. High bitrates are very important with streams that contain a lot of movement such as sporting events, and are typically less important in something like a school concert with less fast movement.
Step 3: The last step is to setup the Server information. There are two fields that we need to fill out on this form. The first is the Stream ID. The stream id correlates to the Channel information on your streaming information page. This may be something like channel1. These values do not contain any spaces.
The next value is the Location field which correlates to the RTMP address from MyVRSpot.
Important: Please replace YOURPASSWORDHERE in the RTMP address when inserting this value into the Tricaster.
You can now hit the Test Connection button. If the test does not succeed, please verify that you have the RTMP and StreamID 100% correct, and also verify that you have replaced the text YOURPASSWORDHERE with your actual password in the Location field.
Once you have successfully run the test, you can save and rename this connection (the default name is typically Unnamed Connection). You should be ready to start streaming.
When you are ready to stream, simply click the stream button and your stream should begin. Please note that streams typically have about a 4-10 second delay based of network latency as well as the quality settings for the stream.
You can test the stream by viewing the streaming player that we provide in your MyVRSpot account, or by going directly to the Stream URL on a different computer or mobile device.
When you are done streaming, click the Stream button again to stop streaming.
If you need additional assistance, please contact us.